Fig. 22.1
Port placement for single-incision right colectomy. Note the left colectomy can be in the umbilicus or in the Pfannenstiel position
The operative technique starts with placement of the SILS™ port device placed in the umbilicus using an open technique. This provides an added degree of safety against inadvertent intra-abdominal injury [24], as well as a cosmetic benefit by hiding the future scar. A vertical incision is made in the fascia large enough to accommodate the single-port trocar (~2 to 3 cm; Fig. 22.2). A fascial opening bigger than the device will cause loss of insufflation during extreme movement of the instrumentation and can add time and frustration to the procedure and the surgeon.
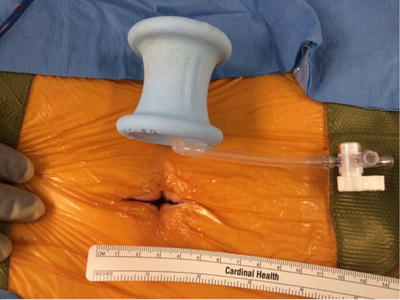
Fig. 22.2
Single-port and umbilical incision. Notice the small incision to accommodate the port to reduce air leaks
Our preference is to use standard laparoscopic instrumentation (i.e., straight) including the scope. This decreases the learning curve and allows the surgeon to perform the procedure with tools to which they are accustomed (Video 22.2). A standard 5-mm 30° laparoscope of bariatric length is then inserted (or rarely a 30° 10-mm laparoscope), followed by two 5-mm working ports with non-articulating instruments: (1) atraumatic bowel grasper and (2) an energy device with multifunctional capability such as the ENSEAL® (Ethicon Endo-Surgery, Inc, Cincinnati, OH) (Fig. 22.3).
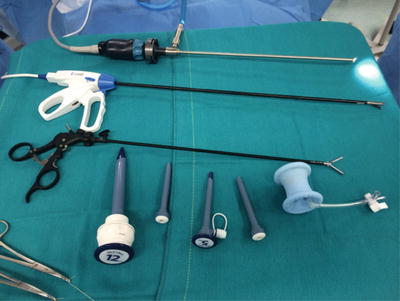
Fig. 22.3
Instruments: 30-degree camera, energy device, bariatric length, and atraumatic bowel grasper. Different lengths will help decrease the extracorporeal collision
I prefer to orient the trocar with the gas port aimed toward the patient’s feet, helping to keep triangulation on the 5-mm port, as well as using the top of the triangle for the camera port (Fig. 22.4).
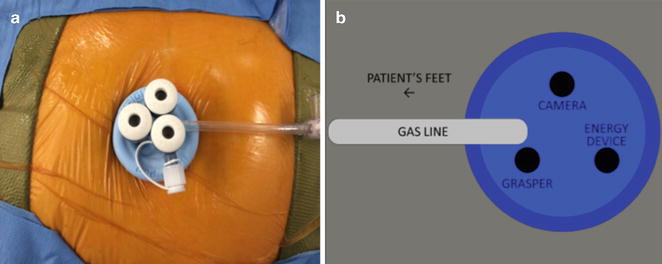
Fig. 22.4
(a) A vertical incision is made in the fascia large enough to accommodate the single-port trocar even in obese patients. (b) Diagram indicating the orientation of the port to allow triangulation of the instruments with the gas line port toward the patient’s feet
The abdominal cavity is explored for adhesions, and most importantly when performing the surgery for colon cancer, the peritoneum and liver must be inspected for metastatic disease. The patient is then positioned in Trendelenburg position and left side down. The omentum is grasped and placed on top of the transverse colon. My common approach is to begin medial-to-lateral dissection where the vascular pedicle is ligated before the mobilization of the colon or the tumor. I prefer to maintain the “no touch” technique and adhere to standard oncological principles [25] with gentle traction on the cecum. The ileocolic pedicle is then elevated; the small bowel is positioned on the left side of the abdominal cavity, allowing visualization of the base of the mesentery. The peritoneum underlying the ileocolic pedicle and the base of the mesentery are opened (Fig. 22.5) using laparoscopic scissors or an energy device of the surgeon’s preference in order to dissect the colon off its retroperitoneal attachments and the duodenum in a medial-to-lateral fashion. Careful retroperitoneal dissection continues until the duodenum is completely identified and the head of the pancreas is seen. Once this is complete, a mesenteric window is created and the ileocolic vessels are divided using an energy device.
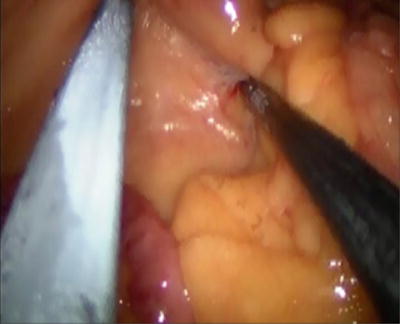
Fig. 22.5
The ileocolic pedicle is elevated to allow tension to help open the peritoneum underlying the ileocolic pedicle. This is extended to the base of the mesentery
After the division of the vascular pedicle, this space is developed in cephalad direction, above the duodenum, between the first portion of the duodenum and the transverse mesocolon. Identification of the right branch of the middle colic vein and artery must happen while dissecting at the origin (Fig. 22.6). Then this can be ligated using an energy device. The mesenteric of the transverse colon is then divided to encircle a distal portion of the colon for the creation of the ileocolic anastomosis. The patient is then positioned into reverse Trendelenburg; the omentum is grasped and divided to be included in the en bloc resection from its attachments to the transverse colon. Next, the hepatic flexure and the lateral attachments are taken down from superior to inferior (Fig. 22.7). Careful dissection should be used when approaching the lateral attachment in the right lower quadrant to minimize the risk of ureteral injury. After confirming the completed mobilization and division of the mesentery of the terminal ileum, the cecum is grasped with a locking instrument to help during extraction (Fig. 22.8). The fascial incisions are enlarged as necessary to exteriorize the specimen for division and anastomosis. The use of a wound protector is recommended to prevent contamination of the wound, tumor seeding, and helping with the exposure. The colon is then exteriorized, ensuring you maintain proper orientation of the specimen (Fig. 22.9). The previously selected area of the transverse colon and the terminal ileum is divided and the anastomosis is created according to surgeon’s preference in either side-to-side or end-to-side fashion with staplers.
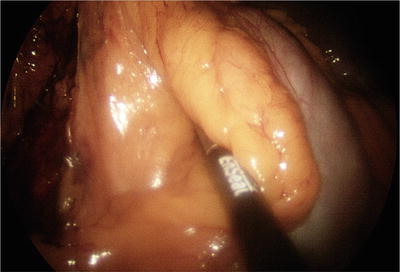
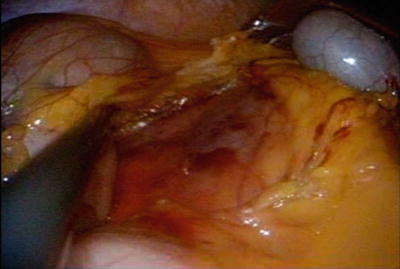
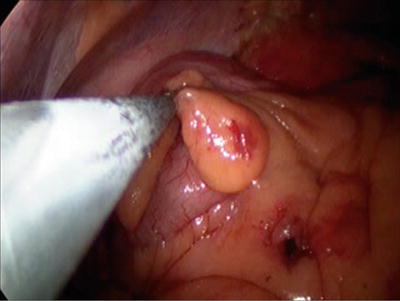
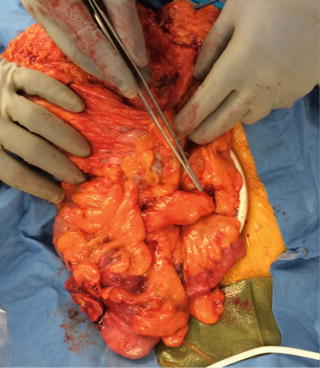
Fig. 22.6
Right branch of the middle colic artery and vein. Notice that division of the ileocolic pedicle decreases the visualization of the duodenum
Fig. 22.7
Takedown of hepatic flexure and the lateral attachments in a superior-to-inferior fashion
Fig. 22.8
After complete mobilization and division of the mesentery of the ileum, the cecum is grasped with a locking instrument to help during extraction
Fig. 22.9
Extraction of the colon with a cecal tumor through the wound protector. Notice the ileocolic pedicle seen at the tip of the instrument
After inspecting the anastomosis intracorporeally, I do not routinely close the mesenteric defect. Then the fascia is closed in either a running or figure-of-eight fashion (Fig. 22.10).
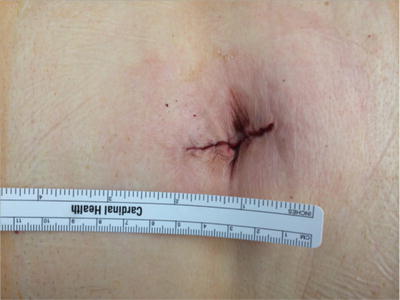
Fig. 22.10
Final incision after single-incision right colectomy
Single-Port Left Colectomy
The indications for the SILS left colectomy are the same as the open colectomy or laparoscopy. Advantages of the SILS approach depend on the surgeon’s experience and the search for alternative operative techniques as well as better cosmetic and highest patient satisfaction results [26–28]. Similar to a right colectomy, there is not an absolute contraindication for the use of single-port laparoscopy, as long as procedure meets the safe surgery criteria. Also, if needed, an additional trocar can be added for camera access or retraction.
Surgical Procedure
The patient’s preoperative evaluation is the same as previously described in this chapter including mechanical bowel preparation and intravenous pre-op antibiotics. After induction of the anesthesia, the patient is placed in lithotomy position with arms tucked to the sides and protected. Special attention is focused to secure the patient to the anesthesia table to prevent falling or moving during extreme table position changes. The routine use of the left ureteral stent for left colectomy may prevent any injury [29], though more likely may allow recognition of any intraoperative injury, as well as early identification of the ureter itself to help expedite the procedure.
Port at the Umbilicus
The surgeon and the operative assistant are positioned on the right side of the patient if the single-port trocar is placed in the umbilicus. The surgeon may also need to stand between the legs of the patient and the assistant on the right of the patient when the alternative port placement of a suprapubic location is used. This suprapubic port site hides the scar and can also be used for colon specimen extraction. The suprapubic location is also over the rectal-sigmoid junction, allowing for direct vision, division of the rectum, and performing the anastomosis.
An open technique is used to make a 3-cm abdominal wall incision to accommodate the SILS port. After entering the peritoneal cavity and achieving adequate insufflation, exploration of the abdominal cavity for adhesions and metastatic disease should be performed if colon cancer is a preoperative diagnosis. If the indication is cancer, then specific identification of the location of the tumor should be the next step. Ideally a previous, preoperative colonoscopy with intraluminal colon marking with ink identifies anatomic location or, if necessary, intraoperative colonoscopy with CO2 to ensure the location. Both colonoscopy techniques are superior to intraoperative manual palpation with instruments.
The patient is positioned in Trendelenburg, and the right side of table is lower than the left. This uses gravity retraction to position the bowel on the right side of the abdomen. Placement of the omentum on top/caudal to the transverse colon allows for identification of the transverse colon and localization of the middle colic vessels and the inferior mesenteric vein (IMV) at the level of the ligament of Treitz. After scoring the mesentery along the medial aspect of the left colon from the inferior mesenteric artery (IMA) to the IMV, the surgeon may use a medial-to-lateral dissection approach with ureteral stents in place.
Surgeons may alternate between the next two steps. First, with the SILS trocar in the umbilicus, the area between the IMV and IMA can be easily accessed using a monopolar scissor. The peritoneum is opened; the longer the incision, the better the exposure of the retroperitoneum (Fig. 22.11). The retroperitoneal dissection is started under the descending mesocolon, which helps retraction by elevating the mesocolon with a sweeping movement up and down. This allows the embryological plane to be identified and bluntly separated. This dissection should be bloodless (Fig. 22.12 a,b). With elevation of the IMV and continued dissection of the retroperitoneum above Gerota’s fascia, you need to identify the inferior border of the pancreas. Dissection continues all the way to the lateral colon attachments with hand-over-hand instrument exchanges (Fig. 22.13).

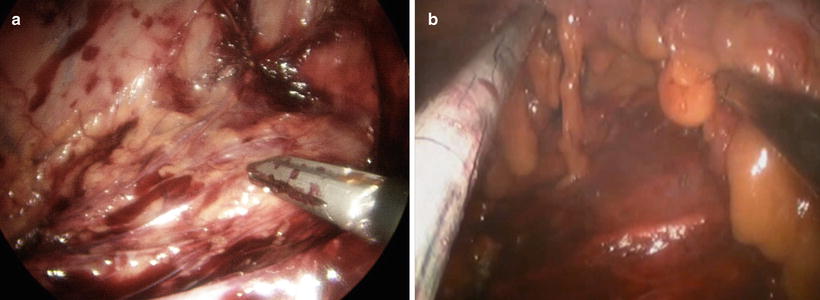
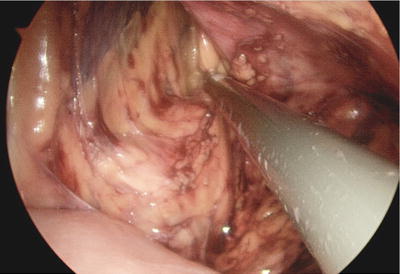
Fig. 22.11
The peritoneum is opened between the inferior mesenteric vein and inferior mesenteric artery; the longer the incision, the better the exposure of the retroperitoneum will be
Fig. 22.12
Retroperitoneal dissection. Notice the elevation of the mesocolon with left arm and bloodless plane (a) before IMA division and (b) after IMA division
Fig. 22.13
Retroperitoneal dissection without division of the inferior mesenteric vein. This dissection is lateral and superior, with identification of the inferior border of the pancreas
Caudal dissection is continued to visually encircle the IMA and identify the left ureter. Once this is performed, the dissection space around the IMA exposes the origin of the artery and sweeps the nerves around the IMA-aorta junction to prevent injury to the sympathetic and parasympathetic nerve plexus. Division of the IMA can be done according to the surgeon’s preference using an energy device, stapler, or clip ligation (Fig. 22.14). Dissecting the IMV without division facilitates the medial dissection of the splenic flexure and the lesser sac. Early division of the IMV will allow the heavy, floppy mesentery to fall on top of the camera and often create the need for an extra instrument to retract the mesentery. The extended dissection of the retroperitoneum will make the dissection on the lateral left colon attachments easier.
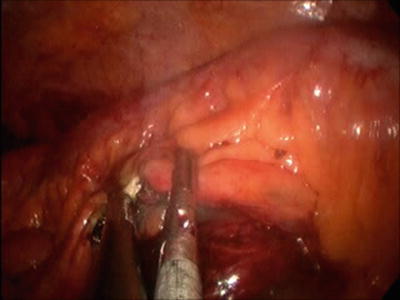
Fig. 22.14
Division of the IMA using an energy device. Notice the in-line view and the triangulation with the crossover instruments
The next step involves opening the avascular area on top of the pancreas to enter the lesser sac. Identification of the posterior wall of the stomach helps confirm the correct location (Fig. 22.15). Continued use of the energy device helps to divide the colon mesenteric attachments to the inferior border of the pancreas until the left lateral attachment to the abdominal wall is reached.
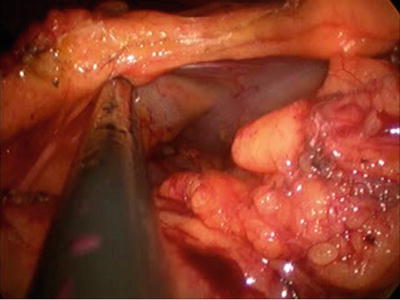
Fig. 22.15
Opening the avascular area on top of the pancreas to enter the lesser sac. Identification of the posterior wall of the stomach helps confirm the location
Attention is now turned to the lateral attachments of the colon, starting with gentle retraction of the sigmoid medially. This will expose the lateral attachments at the level of the pelvic brim (Fig. 22.16a,b). Using the monopolar scissors will facilitate this step. After an opening is created in the lateral attachment, visual identification of the left ureter is easy. The left-hand instrument is used to keep the lateral attachment window open, and continued division of the attachments in a cephalad (toward the splenic flexure) direction will mobilize the entire left colon (Fig. 22.17). The left lateral dissection meets the previous medial dissection at the splenic flexure.
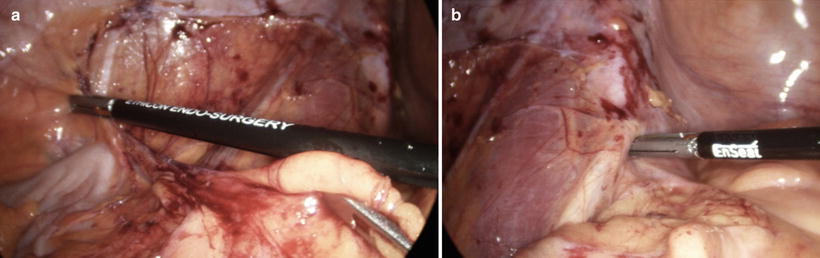
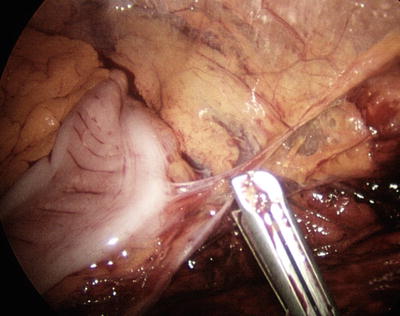
Fig. 22.16
Takedown of the lateral attachments starting at the pelvic brim. Notice the in-line instruments. (a) The retroperitoneum with gonadal vein. (b) Tip of the instrument points at the left ureter
Fig. 22.17


Division of the left lateral colonic attachments (white line of Toldt)
Related posts:


Stay updated, free articles. Join our Telegram channel
Full access? Get Clinical Tree
