Fig. 22.1
Surgical position. The patient is placed in a full lateral position, with a flexion to open the costo-pelvic space
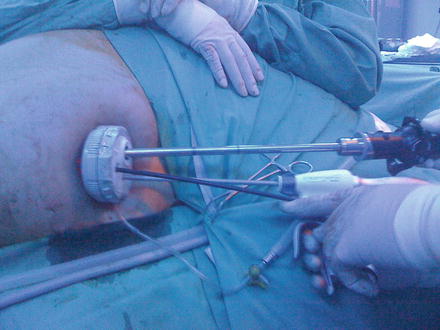
SPLS can be performed through two approaches. (Fig. 22.2)


Fig. 22.2
External intraoperative view of instruments handling during a SPLS
1.
SPLS using multiple trocars: a 15-mm skin incision is made inside the umbilicus and a 12-mm bladeless trocar (Excel Endopath (Ethicon, Cincinnati, OH, USA)) is bluntly introduced into the abdomen under optic control with a flexible tip 10-mm HD scope (Olympus, Tokyo, Japan). After exploring the abdominal cavity, a 5-mm trocar with a flexible threaded cannula (Karl Storz-Endoskope, Tuttlingen, Germany) is inserted to the left of the 12-mm trocar and another 5-mm trocar with a small valve is placed to the right.
2.
SPLS using a multiport device. After the insertion of the Veress needle, a 20-mm incision is made and a multiple-port device (Triport, Quadriport, (Olympus), Uno (Ethicon)) is inserted (Fig. 22.2).
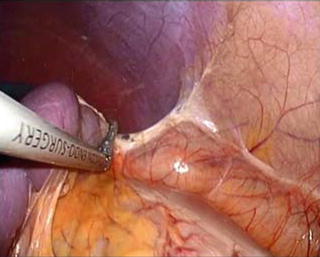
The technique used for splenic dissection is similar to that used in standard LS. After an explorative laparoscopy, the possible existence of accessory spleens is ruled out. A 5-mm curved grasper used for transanal endoscopic microsurgery (TEM) (Richard Wolf, Vernon Hills, IL, USA) is placed through the left port. The slightly curved end of this instrument fits into the flexible trocar or through a port of the mutichannel device, and it is sufficiently curved to work intrabdominally without causing instruments to clash. A 5-mm harmonic scalpel (Harmonic Ace (Ethicon)) is then introduced through the right port. Using this approach, it is possible to mobilize the splenic colon flexure and to reach the lower pole of the spleen. The next step is to gain access to the retrogastric pouch and to severe the short vessels at the upper pole of the spleen (Fig. 22.3). With this view, and due to the flexible tip of the scope, it is possible, if desired, to ligate or clip the splenic artery. The instruments are then moved to the posterior aspect of the spleen and the table is tilted to the right to take advantage of gravity and obtain exposure of the retrosplenic area. The posterior spleno-renal attachments are freed.


Fig. 22.3
Intraoperative steps: spleen mobilization
Sometimes, especially if the umbilical approach is used and there are some difficulties with the more posterior and upper part of the upper splenic pole, a 3-mm instrument can be introduced through the left flank. This mini-instrument can be used to retract or section (hook) retroperitoneal adhesion.
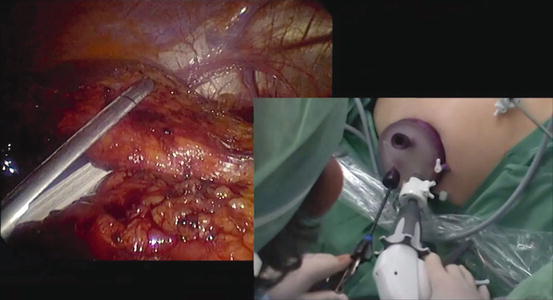
Once the spleen is completely mobile, the flexible scope is withdrawn and the intraabdominal visual control is changed to a 5-mm scope. If the multichannel has several large bore ports (Quadriport (Olympus)), the 10-mm scope can be maintained. A probe inserted through the left 5-mm trocar lifts up the splenic hilum, providing sufficient space for the placement of the endostapler. An endoscopic linear stapler with a 6-cm white cartridge (Echelon (Ethicon)) is inserted through a 12-mm trocar/port and advanced to the splenic fossa. After adjusting the jaws, the endostapler is fired several times until the splenic hilum is completely severed (Fig. 22.4).


Fig. 22.4
Transection of the splenic hilum with an endostapler
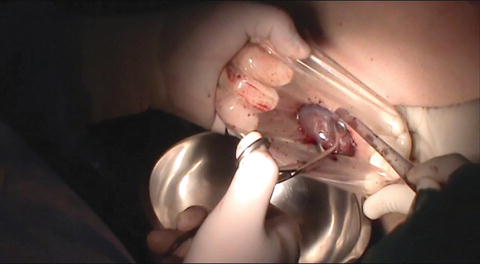
Once the spleen is completely free, a 15-mm endobag (Endocatch II (Covidien, New Haven, CT, USA)) is inserted. The spleen is grasped with a 5-mm instrument and hung in the splenic fossa. The bag is deployed below the organ and the spleen is introduced. The bag is pulled to the umbilical incision and the spleen is retrieved intact or morcellated (Fig. 22.5). Lastly, the operating field is revised and complete hemostasis is achieved.


Fig. 22.5


Spleen morcellation and extraction inside a bag
Stay updated, free articles. Join our Telegram channel

Full access? Get Clinical Tree


