Fig. 17.1
The Karl Storz video equipment
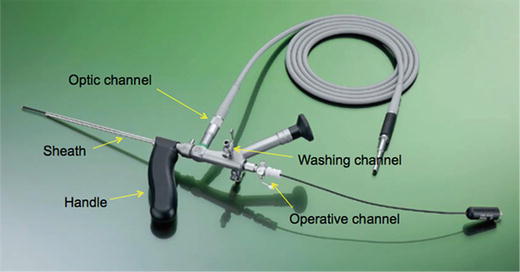
Fig. 17.2
The Meinero fistuloscope
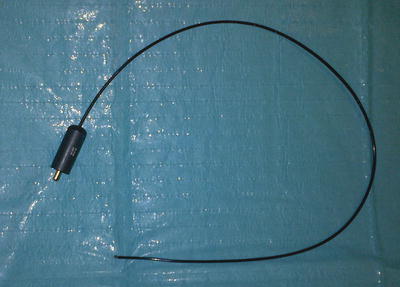
Fig. 17.3
The unipolar electrode
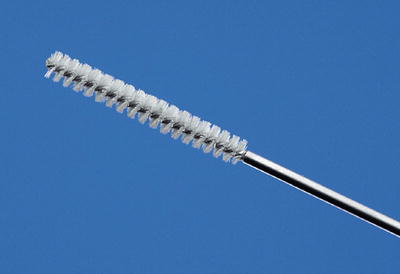
Fig. 17.4
The endobrush
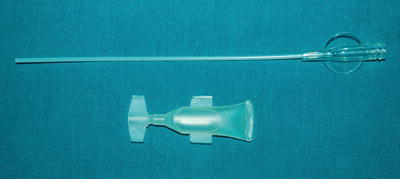
Fig. 17.5
The synthetic cyanoacrylate (GLUBRAN 2, GEM)
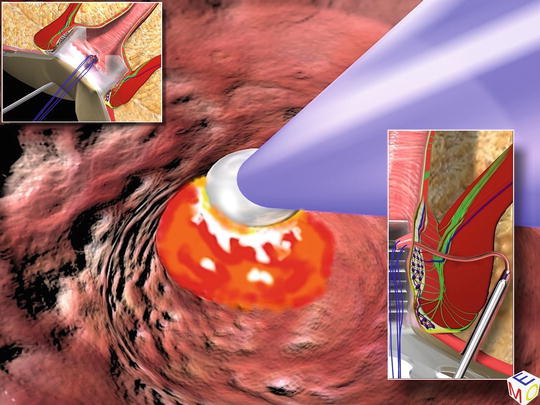
The Diagnostic Phase
The purpose of this phase is to find the main and secondary tracts and abscess cavities and to correctly locate the internal fistula opening. At the beginning of the procedure insert a syringe in the external orifice and inject low-pressure saline solution in order to obtain a fistula tract dilatation. Any scar tissue around the external opening can be removed by electrosurgical knife for ease of entry of the fistuloscope tip and the excised tissue may be sent for histopathological examination. During the insertion, the washing solution is already running, providing a clear view of the fistula pathway, which appears on the screen (Figs. 17.6 and 17.7). At this point, it is very important to be patient and wait for an adequate dilation of the tract. Since the fistuloscope is rigid, it helps to guide it using a trans-anally inserted finger. If the tract is very tortuous, the positioning of a Kocher’s forceps on the external opening, allows it to be straightened by a counter traction. Blocking tissue in the tract can be removed using the 2 mm forceps to facilitate the progression of the fistuloscope. The orientation of the fistuloscope is correct when the obturator appears in the lower part of the screen. The surgeon follows the fistula pathway using slow left-right and up-down movements. Any force used at this stage may lead to the fistuloscope entering the fatty tissue of the buttock and rupturing the fistula, causing severe edema, and the procedure may have to be abandoned. These maneuvers are aided by the complete relaxation of the surrounding tissue induced by the spinal anesthesia. At this point, the finger in the anus helps to straighten the fistula tract by combined movements between the finger and the fistuloscope. Optimum vision of the inside of the fistula is assured by the continuous jet of the washing solution to the point where you reach the end of the fistula pathway which is the internal fistula opening (Fig. 17.8). Dimming the lights in the operating theatre enables an easy localization of the fistuloscope light in the rectum. The assistant can insert an anal retractor in order to localize the internal fistula opening by looking for the light of the telescope in the rectum or anal canal. When the fistuloscope exits through the internal opening, the rectal mucosa clearly appears on the screen. The fistuloscope usually goes out through the internal opening but sometimes it is not so easy, as the internal opening might be very narrow: in that case, its location is found by viewing the fistuloscope light behind the rectal mucosa. At this point, it’s useful to put two or three stitches in two opposite points of the internal opening margin in order to isolate and, above all, not to lose it (Figs. 17.9 and 17.10). The stitches must not be knotted because the internal opening must remain open to allow the flowing out of the waste material during the operative phase.

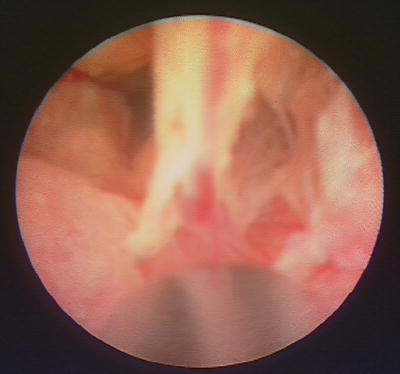
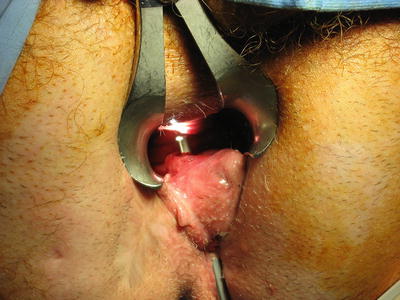
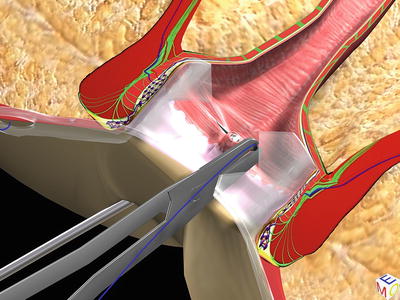
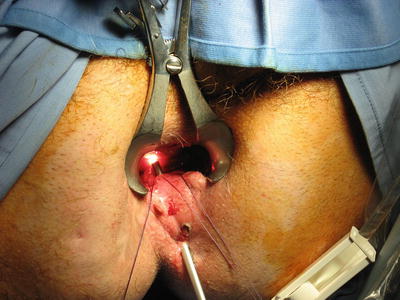
Fig. 17.6
The insertion of the fistuloscope with the glycine–mannitol 1 % solution already running; in the box the fistula pathway appears on the screen
Fig. 17.7
The fork between the main tract and a secondary one
Fig. 17.8
The fistuloscope has reached the internal orifice and the tip is in the rectum
Fig. 17.9
The isolation of the internal orifice with two stitches in opposite points
Fig. 17.10
The isolation of the internal orifice with two stitches in opposite points
The Operative Phase
The purpose of this phase is the destruction of the fistula from the inside, followed by the fistula canal being cleaned/the waste material removed and the internal opening closed hermetically. We start destroying the fistula under vision using a unipolar electrode, which is connected to the electrosurgical power unit (Fig. 17.11) and is passed through the operative channel of the fistuloscope. Starting at the internal fistula opening, all fragments of the whitish material adhering to the fistula wall and all granulation tissue are coagulated. This phase of the operation is completed centimeter by centimeter, from the internal opening to the external opening not forgetting any abscess cavities. The necrotic material is removed under vision using the fistula brush (Fig. 17.12). Until that time, the isolated internal fistula opening remains open to allow the flowing out of waste and washing material into the rectum. At this point, the fistuloscope is completely removed. The assistant stretches the threads holding the internal fistula opening, towards the internal rectal space or the anal canal using a straight forceps in order to lift the internal fistula opening at least 2 cm into the shape of a volcano. We then insert a semicircular or a linear stapler at the volcano’s base and complete the mechanical cutting and suturing. The choice of the stapler also depends on the internal opening position. Using a semicircular stapler, the suture will be horizontal (Fig. 17.13). Using a linear stapler, the suture will be vertical (Figs. 17.14 and 17.15). When the tissue in the area of the internal opening is not sclerotic and allows the formation of a good “volcano,” the stapler can be used; however, if the tissue around the internal opening is too rigid and sclerotic, the use of the stapler might be difficult. In this case a cutaneous or an endorectal advancement flap would be preferred (Fig. 17.16). As a last step, we insert 0.5 mL of synthetic cyanoacrylate (GLUBRAN 2, GEM) immediately behind the suture/staple line via the fistula pathway to further reinforce the suture (Fig. 17.17). In this way the use of the synthetic cyanoacrylate behind the suture line or behind the flap assures the perfect closure of the opening. It is essential to keep in mind that not the whole fistula tract is filled up with the synthetic cyanoacrylate; only a small amount is inserted directly below the suture line. That’s why the fistula pathway has to stay open to allow the passage of secretions. This procedure assures a perfect excision and a hermetic closure of the internal fistula opening, excluding the risk of stool passage. Since the suture is situated tangential to the sphincter, the postoperative pain is low even if the suture falls both in the anal canal and the rectum.