Fig. 19.1
Setup of laser frequency and energy (a) and of the combined ballistic/ultrasound lithotripsy device (b)
19.2 Operating Room Preparation
Care should be taken to prepare the operating room according to the local requirements. For instance, our present OR being a rectangle, the surgical bed has to be put oblique towards the right or the left in order to create enough space for all the devices. Usually, we prepare the floor with adequate absorbing coverings, to afford possible fluid spilling during the procedure. The operating bed must be adaptable for the lithotomic position, radiotransparent, and movable to obtain enough space underneath for the C-arm (Fig. 19.2).
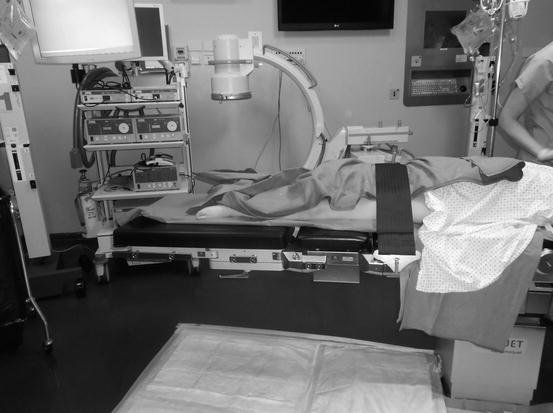

Fig. 19.2
Floor absorbent covering and oblique surgical bed, translated to create the space for the C-arm
The OR, after standard cleaning, has to be filled with all the devices ready for use: anaesthesiologist’s respirator, ultrasound, fluoroscopy screen and C-arm, laser and LithoClast Master with the related pedals, video tower with two monitors (or a single one with the possibility of splitting the two images from antegrade and retrograde endoscopy) and two video cameras, chair with wheels for the surgeon, heating/irrigation devices, 50 liters fluid aspirator, and operating trays (Fig. 19.3).
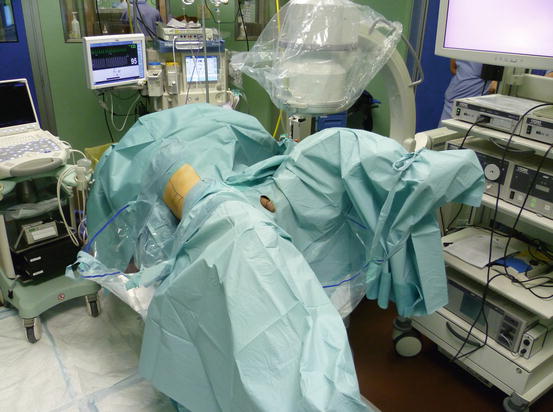

Fig. 19.3
Overview of the full OR ready to start ECIRS
Everything must have been preliminarily checked for efficient functioning. The disposition of each element we mentioned is not casual but arranged according to standardized schemes, different for the right and the left side (see Chap. 11). One of the most important things is that the surgeons must always be able to look at the monitor and at the fluoroscopy screen at the same time without problems.
Before the patient enters the OR, also the three sterile operating trays must be almost ready, with all the instruments and accessories sterile and ready to be opened within the room on a dedicated table. Also lead aprons and collars with the related dosimeters must be readily worn by all the personnel in the OR, to prevent radiation exposure (Fig. 19.4) [2, 3].
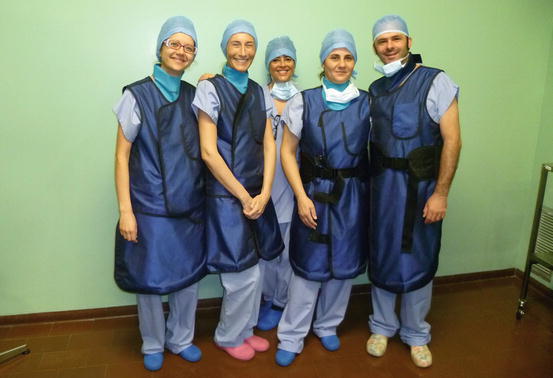

Fig. 19.4
OR personnel wearing the lead aprons and collars before ECIRS
19.3 Patient Positioning
Patient positioning is a task implying serious responsibilities, thus to be shared among nursing staff, surgeon, and anaesthesiologist, since if incorrect, it may cause a variety of lesions, sometimes transient but sometimes irreversible.
The Galdakao-modified supine Valdivia positioning of the patient [4] is less tiring than the alternative traditional position, requiring to turn the anaesthetized patient from the dorsal lithotomic initial position to the prone one. Adequate paddings should be placed, and the patient should be correctly fixed in the final position, with self-adhesive bandages such as peha-haft (Fig. 19.5). Care to avoid excessive abduction of the limbs or tracheal tube/vascular accesses displacement should be taken while moving the patient.
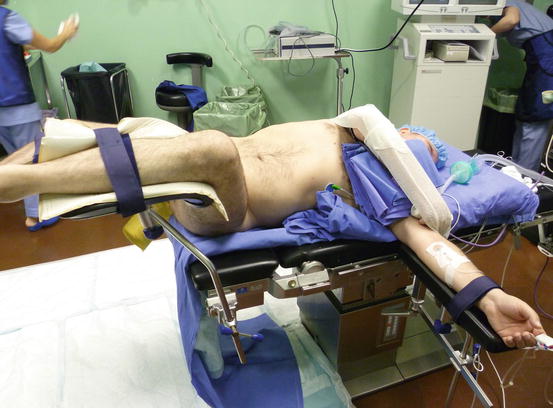

Fig. 19.5
Patient in the final Galdakao-modified supine Valdivia position
Also ECIRS requirements have to be kept in mind, for instance, the contralateral leg should not hinder retrograde access with the semirigid ureteroscope, or enough space should be left under the flank for nephroscopic manipulation (Fig. 19.6).


Fig. 19.6
There has to be enough space for nephroscopic manipulation under the area of the percutaneous access, without being hindered by the border of the surgical table (arrow = direction in which the patient has to be moved) (© Carole Fumat)
19.4 Sterile Draping
After skin disinfection of both antegrade (Fig. 19.7a) and retrograde surgical fields (Fig. 19.7b), sterile drapings can be applied for ECIRS, consisting in one original endourologic draping for TURB/TURP with the bags for draining fluids and another one arranged for the percutaneous zone according to a personal solution (Fig. 19.3), trying to avoid irrigation liquid spilling on the floor or on the surgeon during the whole procedure. We established a sort of sequence in the application of all the sterile drapings (Fig. 19.8), starting from the legs, going on with the thorax, and finishing with the abdomen, sealing all the field with adhesive stripes.
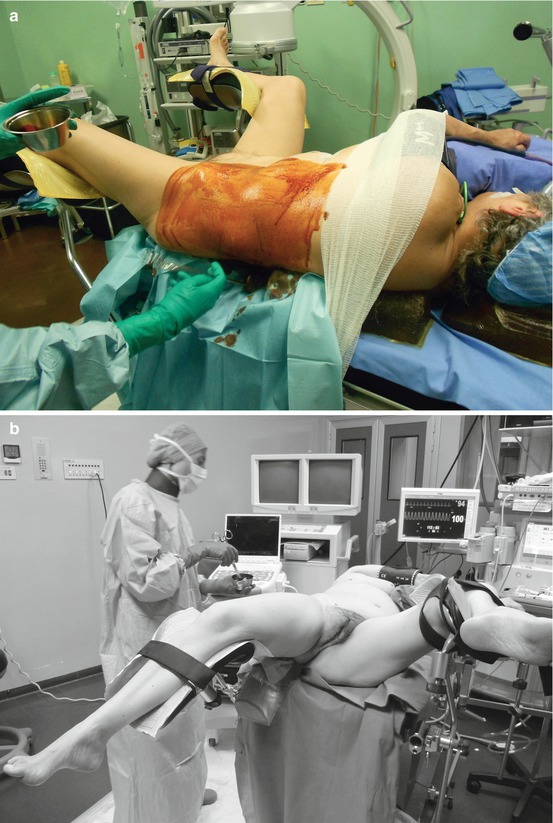
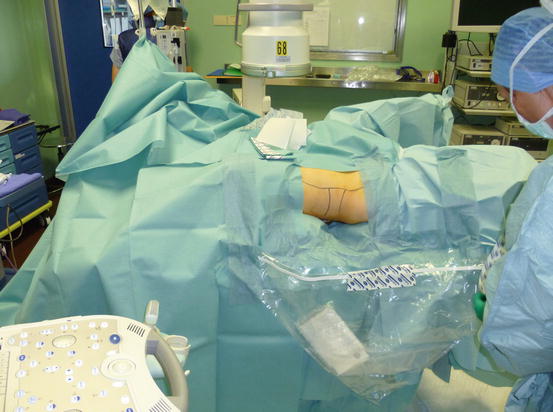

Fig. 19.7
Skin disinfection of both antegrade (a) and retrograde (b) surgical fields

Fig. 19.8


Final sterile draping of the patient, first the legs, then the thorax, and finally the abdomen, sealed on every side
Stay updated, free articles. Join our Telegram channel

Full access? Get Clinical Tree


