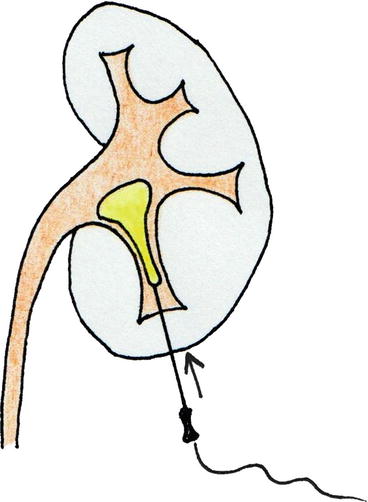
Fig. 13.1
Cephalad 30° tilting of the C-arm to puncture the kidney under fluoroscopic guidance (© Carole Fumat): Initial position (a) Placing a reference clamp on the abdominal wall (b) The clamp is placed in the vertical projection of the target calyx, and the needle is advanced towards the calyx (c) If no urine appears at the extremity of the needle, the C-arm is tilted cranially (d) In this example, the needle moves opposite to the displacement of the clamp on the fluoroscopy screen, meaning that the needle is behind the calyx (e, f) The needle is repositioned accordingly (g, h)
13.3.2 Ultrasound Guidance
Ultrasound guidance alone is possible but rarely employed as unique method (about 10 % of the procedures), exclusively in experienced centers and, namely, in children and young women [3, 11]. Totally ultrasound percutaneous procedures in supine position have also been successfully performed [12]. The advantages of ultrasound guidance include avoidance of radiation exposure and monitoring of adjacent viscera that could be injured (although the occurrence of retrorenal colon, <2 % in the supine position, is fundamentally foreseen with the preoperative CT scan) [13, 14]. The real-time contribution of 3D, 4D, and contrast-enhanced US (CEUS) has also been evaluated [15, 16].
Ultrasound-guided puncture can be performed freehand (Fig. 13.2a) or using a puncture attachment with a needle guide (Fig. 13.2b). The advantage of freehand puncturing is that the axis of the probe can be adjusted without modifying the axis of the needle; however, it requires specific skill and experience. Puncturing with the help of the needle guide may be preferred by some surgeons, because the axis of the needle relative to the probe is constant and the trajectory of the puncture is displayed with a dotted line on the ultrasound screen. Care should be taken to choose the optimal ultrasound probe for renal puncture. One important issue is the releasing mechanism of the needle guide, once the needle is in place in the target calyx, which can cause its accidental displacement. We prefer a re-sterilizable needle guide, releasing the needle with the help of a spring mechanism (Fig. 13.2c). Another relevant feature of the probe is its size. With large probes, occasionally the needle path may be obstructed by the iliac crest because of the peripheral position of the needle. Therefore, we prefer narrower probes, easier to manipulate between the lower edge of the ribs and the iliac crest.
Fig. 13.2
Freehand ultrasound-guided renal puncture (a) needle guidance for the same ultrasound-guided puncture (b) and release mechanism of the needle (c)
13.3.3 Renal Puncture Under Ultrasound-Assisted Fluoroscopic Guidance
Fluoroscopy and ultrasound guidance can be usefully combined for performing a good renal puncture, although this approach is not very commonly applied (less than 15 % in the CROES series) [3].
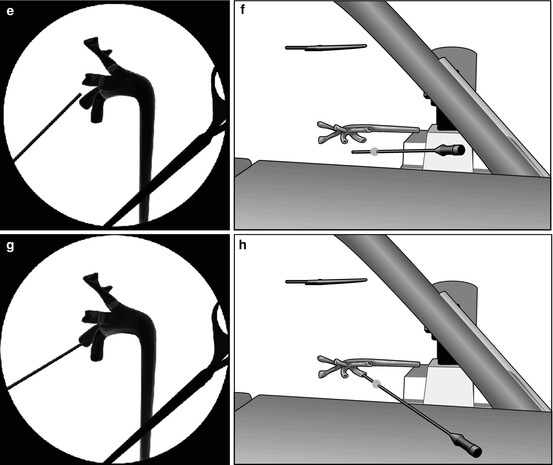
According to our standardized experience, we start the procedure performing a thorough ultrasound evaluation of kidney, stone disease, and adjacent organs (Fig. 13.3a). Then, we identify the exact target of our puncture (the calyx or the stone) with the ultrasound probe, and the probe inclination will reproduce the needle inclination, identifying the third dimension of the puncture and allowing to plan in advance the angle of the needle path (Fig. 13.3b, c). The puncture is then performed under fluoroscopic control, with no need of tilting the C-arm (Fig. 13.3d, e), according to the x/y coordinates on a flat plane on the body of the patient (Fig. 13.3f, g, h), having memorized the inclination of the needle. This method allows a precise puncture of the chosen calyx according to a preplanned three-dimensional “road map” of the needle, reaching its target at the first attempt in more than 80 % of the cases in our series (Fig 13.3i).
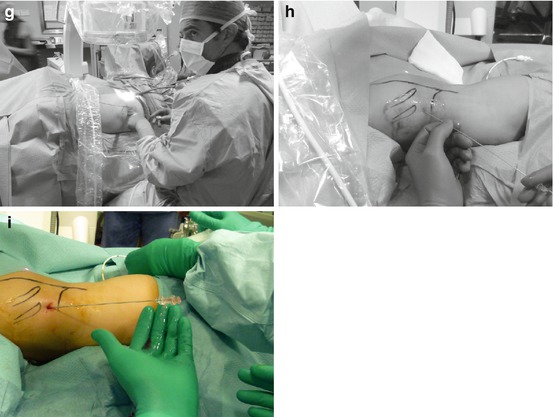
Fig. 13.3
Preliminary ultrasound examination (a) followed by the identification of the inclination of the needle on the third plane (b, c). Subsequent biplanar fluoroscopic-guided renal puncture identifying the other two dimensions (d, e) maintaining the inclination of the needle indicated by the previous ultrasound (f, g, h, i)
13.3.4 Renal Puncture Under Endovision Control
Another kind of renal puncture control to be combined with fluoroscopy and/or ultrasound consists in the Endovision technique [17, 18], advantageous especially for non-dilated systems, complex stone burdens, ectopic or malrotated kidneys, and morbidly obese patients, but valid in general for checking “from inside” the precise exit of the needle through the tip of the chosen papilla (Fig. 13.4a, b). The Endovision puncture consists in the possibility to follow by means of retrograde ureteroscopy (digital or not) associated with a high-definition (HD) video system the percutaneous renal puncture and the following steps (tract dilation and Amplatz sheath insertion). The Galdakao-modified supine Valdivia position is particularly ergonomic for applying this approach. Of course Endovision puncture is not always possible, especially in case of large staghorn stones, but when feasible it can give a valid support and help in reducing the bleeding risk.
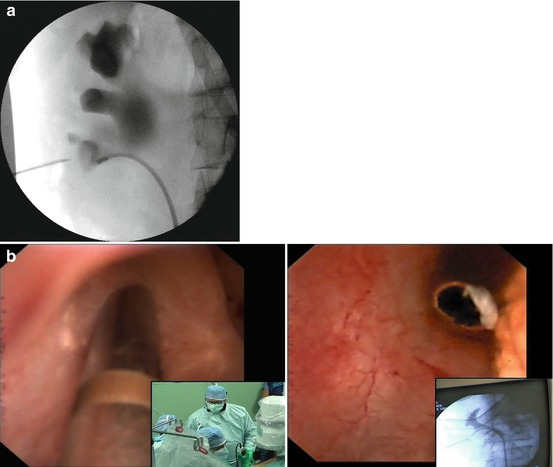
Fig. 13.4
Needle exiting from the tip of the chosen papilla under fluoroscopic (a) and Endovision control (b)
13.3.5 Other Guidance Methods
The “all-seeing” needle has been proposed as a tool for an “eye-guided” renal puncture of the collecting system and as the new frontier of “the smaller the better” philosophy [19] (see also Chap. 24). A 4.85 Ch (1.6 mm) modified needle with an irrigation system and with a micro-optics of 0.6 or 0.9 mm is used. The most important derived application of the all-seeing needle is the Microperc technique, definitely reducing the hemorrhagic risk of the percutaneous approach thanks to the small diameter of the instrumentation. As usual, the problem is that in spite of the “all-seeing needle,” the endourologist still needs other guidances to perform a correct renal puncture (fluoroscopy and/or ultrasound), and a further consideration is that you realize to be into the collecting system and in the right part of it containing the stones only when you are already in it, i.e., when you have already found your percutaneous way, while the path from the skin to the upper urinary tract continues to remain a “blind” one.
Following a similar philosophy, the old procedure of the retrograde nephrostomy application (Lawson technique) has been recently revised under flexible ureteroscopy guidance (Ureteroscopy-Assisted Retrograde Nephrostomy = UARN) [20, 21]. This proposal has been made to overcome the reported difficult learning curve of the antegrade renal puncture, especially in non-dilated systems, and to reduce radiation exposure and has also been applied in the Galdakao-modified supine Valdivia position [22]. However, our criticism is that the aid of ultrasound is still absolutely needed in order to avoid visceral damage and that the path from the collecting system to the skin still remains a blind one, exactly as in any antegrade renal puncture, besides being linked to the rigidity of the devices employed.
13.3.6 The Future of Intraoperative Renal Puncture Guidance
Presently we have at our disposal, before going into the operating room, sophisticated imaging tools (for instance, a preoperative multidetector CT pyelography with multiplanar reconstructions and 3D reformatting) for a thorough preoperative planning in any patient requiring a treatment for urolithiasis. Being an optimal renal puncture the crucial step of any percutaneous procedure, in the daily routine endourologists would need even more informative and essential supports during PNL, but as a matter of fact, they can rely only on the basic and simple intraoperative assistance given by fluoroscopy and/or ultrasound (CT and MRI have also been tried, but of course these imaging tools are very expensive, complicated, and difficult to apply from a practical point of view). Nowadays there is a variety of emerging innovative tools for the intraoperative support of PNL/ECIRS [23, 24], aiming at the improvement of the efficacy and safety of such procedure.
13.3.6.1 UroDyna-CT and Laser-Guided Renal Puncture
The UroDyna-CT guidance needs a ceiling-mounted C-arm gaining multiplanar reconstructions (Fig 13.5a, b), which are integrated with 3D digital fluoroscopy after antegrade contrast filling of the collecting system (Fig 13.5c) and CT/MRI images, a specific full-carbon urological interventional table in the operating room, and a Syngo-i-Guide® laser-guided system leading the needle on a preplanned path. At this time this technique is helpful especially for difficult punctures, enhancing precision of the 3D puncture planning, but is very expensive, limited to very selected centers, and, in spite of the effort to reduce radiation and time for the puncture, with a still significant X-ray exposure [25].
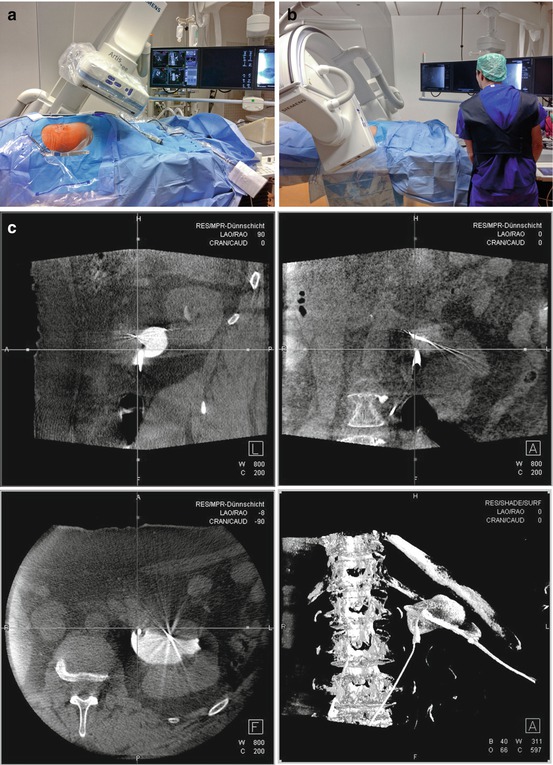
Fig. 13.5
In UroDyna-CT, data acquisition is obtained with ceiling-mounted multidirectional C-arm (a, b); multiplanar reconstructions allow to plan the optimal puncture path (c) (Courtesy of Prof. Maurice-Stephan Michel and Dr. Manuel Ritter)
13.3.6.2 Other Image-Guided Aids for Renal Puncture
A simplified version of the abovementioned image-guided puncture relies on ultrasound, with evident advantages with regard to costs, ease of management, absence of radiation exposure, and real-time application. The computerized elaboration of CT/MR images after their acquisition by a software allows real-time combined ultrasound scanning for image-guided 3D navigation. The electromagnetic sensor on the tip of the needle helps tracking its path, clearly visualizing its placement [26].
13.3.6.3 iPad-Guided Renal Puncture
Another very appealing new tool is the computer-assisted surgery, already successfully tested in certain settings such as laparoscopic cholecystectomy and, in the urologic field, for laparoscopic procedures on kidney and prostate. Special colored radio-dense markers are applied to the skin of the patient at the time of CT image data capture, which on the surgical bed at the time of surgery will function as navigation aids, ensuring perfect overlapping of the virtual and intraoperative anatomic elements (Fig 13.6a). An innovative DICOM High-Definition Volume-Rendering Software from Favia has been developed by the German Cancer Research Center. This software allows to overlap 3D images from a 64-thin-sliced CT scan of the collecting system and surrounding organs performed in the same position of the patient as during PNL to the body of the patient undergoing PNL on the surgical bed. The back-facing camera of the iPad obtains images from the access site, compresses, and transmits them via wireless local network to a server located at the control unit of the fluoroscopic table. The server runs the algorithms to analyze the position of the markers in relationship with the iPad and to compute a correct registration of both video image and CT (Fig 13.6b). Finally the server creates the augmented reality-enhanced image and sends it back to the iPad (Fig. 13.6c) [27].
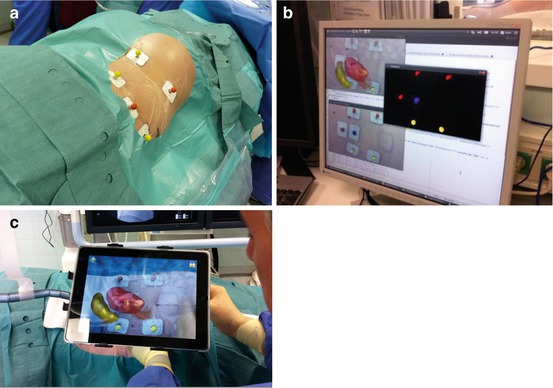
Fig. 13.6
iPad-guided renal puncture: markers placed on the skin serve as spatial reference points (a); segmentation is performed by a server using previously obtained CT images (b); the camera of the iPad allows identifying the skin markers (c); this permits to precisely display the augmented reality images of the kidney on the screen of the iPad (Courtesy of Prof. Jens Rassweiler)
13.3.6.4 Electromagnetic Tracking System for Renal Puncture
To conclude we would like to report a recent interesting proposal, which deserves to be thoroughly developed. The first step consists in the retrograde application of a guidewire with electromagnetic features. The electromagnetic tracking system of the retrogradely inserted guidewire allows the antegrade-guided application of the needle into the renal cavities. As a matter of fact, this approach combines a variety of advantages, including the absence of radiation exposure, the Endovision control of the needle entrance, and the electromagnetic guidance of the needle to the upper urinary tract (with the possible aid of the ultrasound control) [28].
13.3.6.5 Other Aids for Renal Puncture
A novel navigation system to assist percutaneous needle placement, the Locator, has been described and compared with conventional manual techniques. It is a device stabilizing the needle, relying on an adjustable lockable multidirectional head fixed to the operating table, based on fluoroscopy and the bull’s eye technique [29].
13.3.7 Single Versus Multiple Renal Punctures
A single percutaneous access seems to be associated with a reduced morbidity (namely, bleeding) when compared to multiple access punctures and comparable stone-free rates using flexible nephroscopic and/or ureteroscopic retrograde approach [18, 32–35]. Multiple accesses additionally have a higher potential for damage or destruction of functioning renal tissue, resulting in diminished global renal function [36]. The CROES study reported multiple punctures in 8 % of the cases [3], which are needed when the stone cannot be approached by the rigid instrument via the primary access or by any flexible instrument. A further Y puncture can be made through the working sheath through the same incision; alternatively, more formal multiple accesses, with separate skin incision and separate tracks, can be performed.
13.3.8 Safety/Working Guidewire Application
Once the collecting system is reached, with outflow of urine from the needle, the following task is to push a guidewire inside the renal cavities, and possibly down the ureter and outside the external urethral meatus, obtaining the so-called “kebab” or “through-and-through” patient, the maximally safe arrangement during a percutaneous procedure (Fig. 13.7a, b). We preferentially use a hydrophilic guidewire because of its easier descent downwards into the ureter, although care should be taken not to peel its coating during its retraction through the needle (Fig. 13.8).

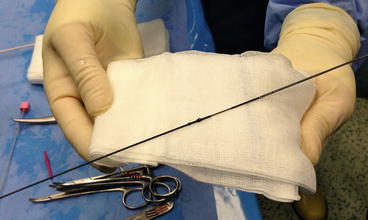
Fig. 13.7
Fluoroscopic image of a descending guidewire (a) and the “kebab” patient with the “through-and-through” guidewire, entering through the percutaneous access and exiting through the external urethral meatus (b) (© Carole Fumat)
Fig. 13.8
Peeled hydrophilic guidewire after its retraction through the Chiba needle
If the guidewire does not pass down into the ureter, it can be coiled into the renal pelvis or a distant calyx and later recovered retrogradely by means of ureteroscope and graspers or nitinol basket (while an additional guidewire can be applied retrogradely via the ureteroscope) (Fig. 13.9a, b). Alternatively, the antegrade retrieval of a retrogradely inserted guidewire is also possible after the insertion of the Amplatz sheath.
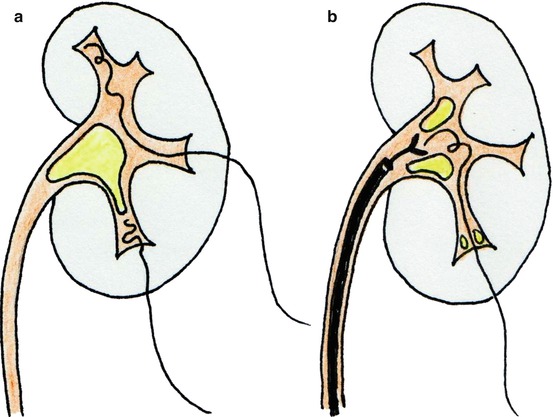
Fig. 13.9
If the guidewire does not descend along the ureter, it may remain coiled within the pelvis or a calyx (a) and be subsequently retrieved by means of graspers through a retrogradely inserted ureteroscope (b)
If the guidewire does not enter the collecting system because of a staghorn stone, a useful maneuver consists in the temptative dislodgement of the impacted stone pushing gently on it with the needle (Fig.13.10). Another trick could be the delicate saline injection through the needle and/or the low-pressure irrigation through the flexible ureteroscope, in order to create a sort of “water path” helping its passage (Fig. 13.11).